Windows Live Mail 2012
Important!!
These settings only apply to email addresses hosted by Ashland Home Net. If you use a web-based mail service (Yahoo, Gmail, Hotmail, etc.) you will need to obtain the proper settings from them.
Step 1
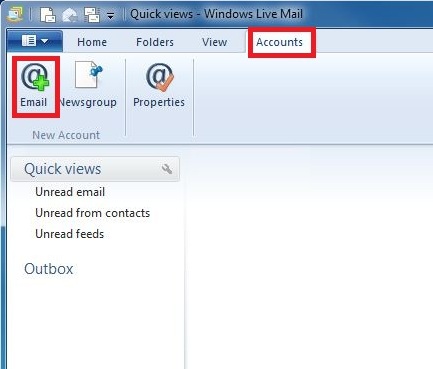
- In Windows Live mail click Accounts
- Then click the icon labeled Email

Step 2
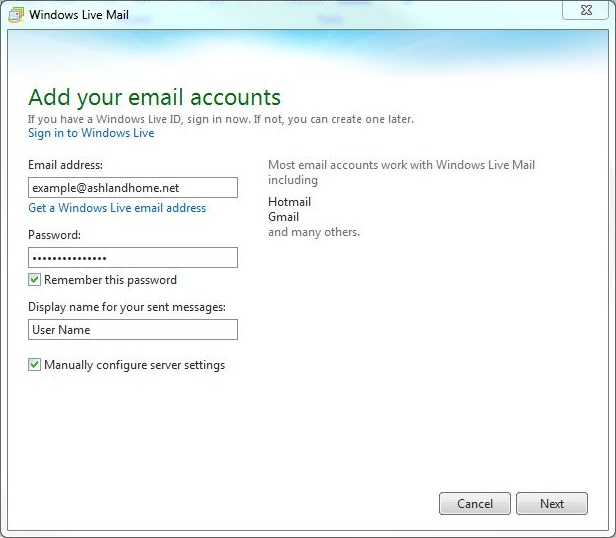
- Fill in the boxes with your email address and name.
- The password is the password you gave us when we created the account.
- Make sure the Remember this password is checked
- Manually configure server settings is checked
- Click Next

Note * If you can't remember your password give us a call or email us and we will help you reset the password.
Step 3
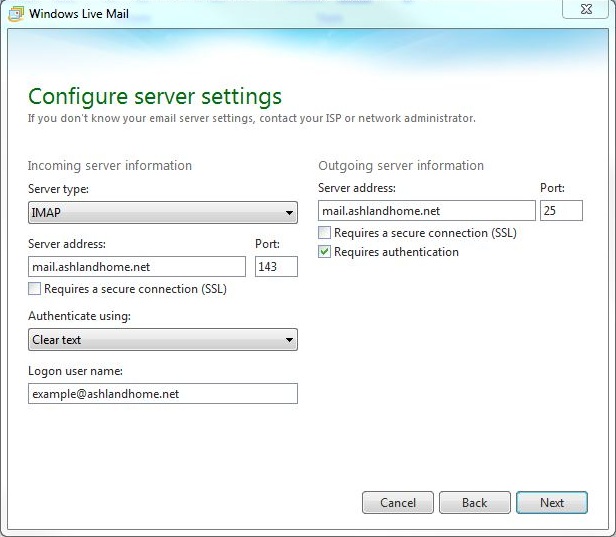
- The server type will be IMAP.
- Fill in the information for your incoming server address.
The server is going to be your last part of your email address (called the domain) but instead of you email@domain.net or .com it will be mail.domain.net or .com See the list below for some examples
Note* For @opendoor.com, and custom domains previously hosted by Open Door Networks, the incoming server is mailx.opendoor.com.
| Email Address ends with | Your incoming Server |
|---|---|
| email@97520.net | mail.97520.net |
| email@ashland97520.com | mail.ashland97520.com |
| email@ashlandcreek.net | mail.ashlandcreek.net |
| email@ashlandhome.net | mail.ashlandhome.net |
| email@ashlandnet.net | mail.ashlandnet.net |
| email@ashlandoregon.org | mail.ashlandoregon.org |
| email@lithiawater.com | mail.lithiawater.com |
| email@mtashland.net | mail.mtashland.net |
| email@mind.net | mail.mind.net |
- For Authentication select clear test
- The Logon user name is your email address.
- Fill in the information for your outgoing server address.
The server is going to be your last part of your email address (called the domain) but instead of you email@domain.net or .com it will be mail.domain.net or .com See the list above for some examples
Note* For @opendoor.com, and custom domains previously hosted by Open Door Networks, the outgoing server is mailx.opendoor.com. - Make sure Requires authentication is checked.
- Click Next

Step 4
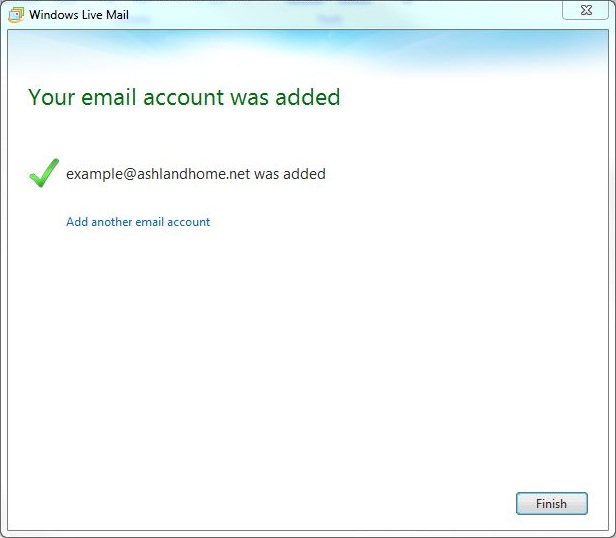
- Click Finish
- Your account is now setup.
